What we packed:
- Big hard case luggage for non-cycling clothes, shopping and brompton bags
- Two hard case bike carriers containing two foldable bikes
- 1 backpack each (with helmet strapped to backpack)
Access:
We flew in to Fukuoka international airport, took the shuttle bus to domestic terminal and got on the train to Hakata (total about 15-20 min) where we deposited our hard case luggage and bike cases with the hotel and made our way to Onomichi station with only our bikes, brompton bags and backpacks. There is also a direct bus from the international airport to Hakata station and we took that when going back home.
For the train ride to Onomichi, we used the JR setouchi pass which we purchased from JTB in Singapore at 17,000 yen per pax. The pass is good for unlimited rides on UNRESERVED SEATS on all JR trains (including Nozomi Shinkansen) in the marked region for 5 consecutive days.
 |
| Bikes need to be covered for the train journey |
 |
| If possible, sit at the last row in the carriage so you can put your bikes behind your seat |
Bike rentals:
If you are not bringing your own bikes, do rent the good Giant brand bikes available from U2 at Onomichi and Imabari station. The Red Bicycles Onomichi at the shotengai has a good range of pro bikes too. Do check them out. The boss can speak English and is extremely helpful.
We rented bikes from Sunrise Itoyama at Imabari 7 years ago and the bikes were so lousy that we couldn’t even complete one bridge!
Attire:
The weather was between 5-15 deg C with strong winds at some sections. A good windbreaker is essential. I strongly recommend North Face Windwall series as it’s very lightweight, packs compactly yet is very effective even against the head winds.
I get cold very easily and I wore:
 |
| 1 merino wool camisole |
 |
| 2 long sleeved merino wool base layers |
 |
| 1 base layer tights |
 |
| 1 set of normal short-sleeved cycling jersey and exercise shorts |
 |
| 1 north face windwall windbreaker shell |
1 Cashmere scarf (no picture)
It started off a little chilly but I warmed up and had to remove one of my merino wool base layers halfway through. The next day I just wore one base layer and it was fine.
Sunblock is a must and I had a bottle of spray on sunblock which I sprayed generously when we stopped for a break or at traffic junctions.
Accommodations:
We stayed in Onomichi the day before the first half of the ride, Hakatajima on the second night and Imabari at the end of the ride.
Our route
There are 6 recommended courses from beginner to advanced. We took the blue course (I think it’s intermediate) which is the easiest to follow because you can’t get lost if you follow the blue line on the road.
 |
| Clearly-marked route. Just follow the blue line which goes from Onomichi to Imabari |
There are plenty of toilets and convenience stores (Lawson, 7-11, Family Mart) along the way so if you feel thirsty or hungry, you can just stop by one of the many stores to grab a snack.
 |
| Ice cream and mochi (since we're cycling, we can afford to eat desserts!) |
There are 7 bridges connecting 6 islands between Onomichi and Imabari. The first bridge connecting Onomichi to Mukaishima (Onomichi Ohashi) is not made for cyclists or pedestrians so you need to take a ferry to the start point of the cycling route. The ferry terminal is opposite the JR Onomichi station and it’s a short 5 min ferry to the start point of the shimanami kaido. The cost is 100 yen per pax and 10 yen per bike.
 |
| On board the ferry |
To get to each of the other bridges, there is an elevation of about 3-4 deg for about 1-1.2km (except kurushima kaikyo which has a longer and spiral ascent) which means there’s an equal distance of descent for you to enjoy after crossing each bridge.
We read mixed reviews about starting from Onomichi or Imabari and after the experience, we felt that we have made the right choice to start from Onomichi. Although some reviews mentioned that there’s more down slope and less head wind if you start from Imabari, we felt that the scenery was nicer as we traversed and coming from Onomichi, the first bridge is not made for cyclists and pedestrians so you need to take a ferry to get to the route. The second bridge which is the first you cycle on was the most letdown as we were cycling under the bridge rather than on it while the last bridge Kurushima Kaikyo was the most spectacular with the most breathtaking views and spiraling down to complete your route was really exhilarating. If it had been the other way around, it would have been rather anti-climax in my opinion. Imagine ending your route with a ferry ride... haha so I’ll strongly recommend going from Onomichi to Imabari if your priority is to enjoy the ride rather than speed.
 |
| Manhole at Onomichi |
 |
| Second Bridge: Innoshima Bridge |
 |
| Third Bridge: Ikuchi Bridge |
 |
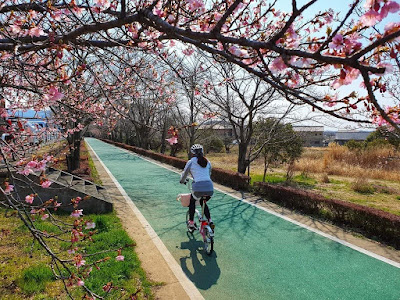
| Lovely blooms along the way |
 |
| Fourth Bridge: Tatara Bridge |
 |
| Fifth Bridge: Omishima Bridge |
 |
| Crossing from Hiroshima to Ehime! |
 |
| Sixth Bridge: Hakata-Oshima Bridge |
 |
| Gearing up for last bridge: Kurushima Kaikyo |
 |
| The spiral climb up to reach Kurushima Kaikyo |
 |
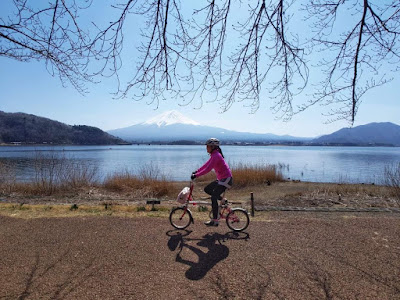
| Kawazuzakura at the end of Kurushima Kaikyo |
 |
| Lunch at Kaze no resutoran at Sunrise Itoyama |
Although the Japanese pamphlet says the course takes 5 hours, the English pamphlet says 8-10 hours. I guess if you factor in time to take photos and stopping for breaks, that's about right. Depending on your fitness level and priority (speed or enjoying the sights), decide on whether you want to complete it in one day or spread it out into 2 days.


Comments
Post a Comment